
Start by measuring your little girl. You want to measure her from the tip of her finger to the other tip of the finger with her arms stretched out straight up to shoulder level. Then measure her from the nape of the neck to just below her bottom. Take that measurement and double that length, because when the shawl is finished, it will be folded over in half. You will want to add an extra inch for a hem. Then make your hem 1/4 inch all the way around the material. The best material to use is Gabardine. It's more expensive than other materials, but it holds its shape well and is strong enough to hold the fringe. It also looks goot too. It usually takes anywhere from 1 to 2 yds. for a good size shawl.

Next, you might want to trace your little girls hands and cut them out of another gabardine material or any kind of material you want. Make a pattern of the hands out of "wonder under" too and iron it to the back of the hands. Then you will want to place them onto the material where you want them. I placed mine like this below.

I placed three (3) sets of hands on my granddaughters shawl.

Then you might take some seedbeads, I used some clear sparkly seedbeads, size 12's and beaded an outline all the way around each hand. This can be very time consuming, but it really looks keen when you are finished. It took me about 3 days to do all the hands, but that's because I had to do other things too, like cook, clean house, cook, clean house and blog, and other grandmotherly things in between beading.

I don't have a keen camera right now, so you can't really see the beauty of the beadwork, but it's nice. Then you will want to get some fringe, and take it all apart and put it in a container and you will also need a small, metal, sharp crochet needle.

I put mine in a hatbox. Then take two strands of fringe like above and find the middle of the fringe, like above. Then take your crochet needle and punch a hole into the hem of your shawl, like below.

Place your fringe in the hook of the needle and pull it through and loop like below.


Loop like above.


Then you will want to go all the way around the shawl, I space mine about 1/4 inch apart, or less and then after you pull your fringe all the way around the shawl, you'll want to go aback around all the way and tie loose knots on each fringe. After that, the shawl is complete.

You might then want to trim the fringe to the desired length.
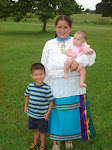
I'm sorry the photos are so blurry, I'm still trying to figure out the settings on my camera. I do have a photo below of TinyBit with another shawl on, to show you how they look when wearing.

Below are the little girls and boys with Teacher, parading in for the Headstart Graduation Pow-Wow last spring.


Time for dancin.
Hope everone stays warm and safe during this winter blast.


No comments:
Post a Comment